Wainscoting on the cheap – a DIY project
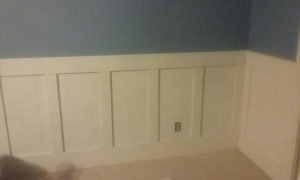 I had a very boring master bedroom and wanted to spice it up. First of all the previous owners were big fans of purple. They painted it in a few rooms, including my master bedroom. I always knew the paint color had to go, but I wanted to do something more. I had tried my hand at wainscoting before, but wanted a different look.
The bottom line though, it couldn’t break the bank. I did a little research on styles and how I could do it with limited funds and limited skills. I have done lots of projects, but I am not an experienced carpenter.
I settled on a shaker style wainscoting due to it’s simplicity and my perceived lower cost. There are two basic supplies I would need for my shaker style wainscoting, the material for the rails and stiles and the backing that would sit behind the rails and stiles.
Here is my basic layout:
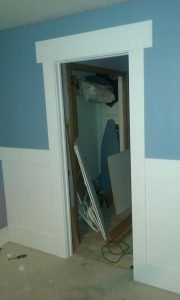 Backing – I installed a plywood backing behind all of the rails and stiles. I put this at the height of 40 inches all around the room. I chose that height because that is the widest opening in the trunk of my car. I didn’t want to go much higher than that up my wall anyway, but it is a little more height than some I have seen.
- Rails and Stiles – I decided to use an 8” width for the baseboard rail. I thought that would be a substantial look. I went with a 6” width for the top rail. I chose a 4” width for the stiles.
- Door and Window Trim – I made the trim on either side of the two doors (one entry and one to the master bathroom) in the room 5” wide and 7” above the door. The trim on either side of my windows was 4” and above the windows about 6”. These choices were trial and error based on how they looked with a trial run.
- Design- I wanted the stiles to be around 18” apart, that plan changed when I modeled a section and decided at around 15”. The reason I say “around” is due to obstructions like electrical outlets and cable or phone plates.
Materials
The backing can be made of plywood or any type of solid material. I have seen some shows where they don’t actually use a backing, they just leave the drywall exposed. My drywall has a slight dimpled pattern to it, so I knew that would look like drywall after I was finished. I suppose I could have tried to skim coat the drywall to make it look smooth, but I also wanted it to seem more like wood than just a super smooth surface. Plywood would increase costs. All I wanted was a super thin version of plywood. I didn’t need it to be ½” or ¾” thick. I found .2mm thick plywood at Home Depot for less than $5 for an 8’ x 4’ sheet.
You could spend a small fortune on real wood for your rails and stiles, I was going to paint my wainscoting white, so I didn’t really need the quality of real wood anyway. I chose MDF as my material, it is much cheaper than real wood and so much easier to work with.
My walls, like most of yours, are not perfectly plumb. There are some dips and gaps, especially in the corners that would be highlighted if you were using hardwood like maple. MDF is heavy like wood, but after it is cut in 4”, 6” and 8” widths it will bend quite a bit, that is good to conform better to the wall.
MDF at Home Depot or Lowes is about $24 for a 4’ x 8’ sheet in my area. MDF can’t be sanded very easily, it needs to be cut. Also, be careful of your corners while you are working with your pieces as they will be more fragile than hardwood. If you want to use a router to make nice detailed edges, MDF isn’t a good choice. However, for a simple rustic look like I have, it is a great low cost choice.
Cutting and painting
I 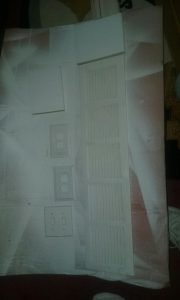 had the backing cut at Home Depot so my boards were about 8 feet x 40 inches.
I initially cut most of my MDF pieces in strips of 4, 6 or 8 inch wide strips the length of the MDF (8 feet). The 8” strips became the base rails and the 6” wide strips become the top rail. I then cut up the 4” wide strips into lengths of 30 inches and these were the stiles that ran vertically in between the base and the top rails.
I didn’t cut everything at once because I knew I wouldn’t be able to calculate all of it until I started to put the material on the wall. I took the pieces outside and spray painted them with a power sprayer. I didn’t have to completely cover the pieces perfectly, this is mostly a prime coat as I wanted to hand paint the top coat so I could see the brushstrokes in the finished product. It looks more authentic I think.
You will want to paint your vent covers and your outlet, cable and light switch cover plates with a sprayer as well to get a nice even coat.
The sides of the cut MDF might soak up the paint, so you might have to paint these two or three times.
Affixing to the walls
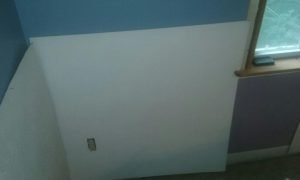 The first step is to tack the thin plywood to the wall all around the room cutting out openings for the cable and electrical outlets.
The next step is to attach the 8” base rails around the room. This part of the plan is simple, but again, with uneven floors, you might have to work to get level base rails. It is best to put these in place before attaching to the walls to see if you need to make adjustments.
The top rails are next. You can more easily put these up by simply using a level and attaching them around the room at a given height.
The final step is to attach the vertical stiles all around the room. I chose 15” in between stiles, but you might choose a different space between the stiles based on obstructions or personal choice. I chose to find the midpoint of the wall and work towards the sides. I did this first to test my layout and it worked pretty well.
Conclusion
All in all I used four 4’ x 8’ x ¾” thick sheets of MDF and eight sheets of thin luan type plywood. I bought 2 gallons of white paint and used most of it. I also bought a tube of caulk to seal up the gaps. Total cost of my project was less than $160, plus the blood sweat and tears.
I know this wasn’t a step-by-step guide to show you exactly how to put up wainscoting rather than an example of how you can achieve an expensive look very inexpensively as long as you have some basic skills a simple design and a lot of time.
Overall I am very satisfied by the way it turned out, but more importantly, I know I achieved a pretty nice look at a super cheap price.


